Blogs
Adding a Blog Post
Please follow the steps below to add a blog post.
- Go to this link: http://www.hwapps.org/wp-admin/edit.php.
- You can add a new post from ‘Add New’ sub-item. Also, you can add a Post using a direct blue button - ‘Add New’ provided beside ‘Posts’ title.
- Below the 'Posts' title, a list of all posts including drafts, pending, and deleted posts is provided in the ‘All’ sub-item. The ‘Published’ sub-item will provide a list of posts published successfully on HWapps. ‘Drafts’ are the list of posts which are still in draft phase and not yet published. Draft posts can be modified at any point and saved before publishing. ‘Pending’ is the list of posts which are pending for review. ‘Trash’ is the list of all deleted posts.
- Below this menu, there is a drop down list showing ‘Bulk Actions’. By selecting ‘Edit’ or ‘Move to Trash’, you can ‘Apply’ these actions in bulk to selected posts in the list.
- By selecting ‘All dates’, you can choose to publish monthly content and filter posts as required.
- You can search for a particular post by choosing the ‘Search Posts’ button at the extreme right corner by entering keywords.
- Below ‘Search Posts’, navigation arrows are provided to go to the next or previous page of posts.
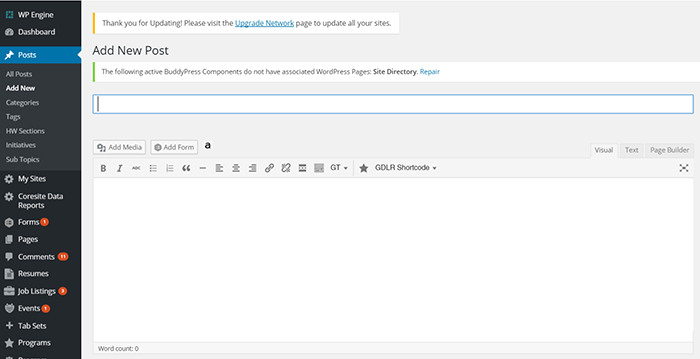
2. After clicking ‘Add New’, a new form will appear on the screen to add all post details. You can also go directly to this link if you want to add new blog post: http://www.hwapps.org/wp-admin/post-new.php. Add the title of the post in the text box provided with a note ‘Enter title here’. Below this title box, one more rectangular text box is provided to add post content. You can also add media using the ‘Add media’ button (pictures, videos, etc). All blog formatting options are provided at a top of this text box.
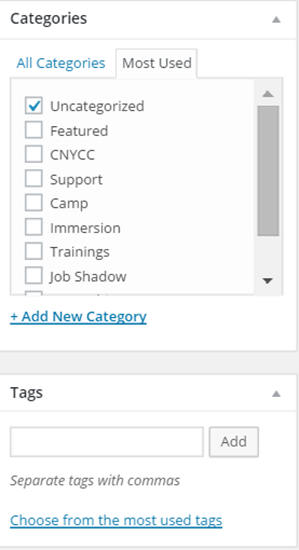
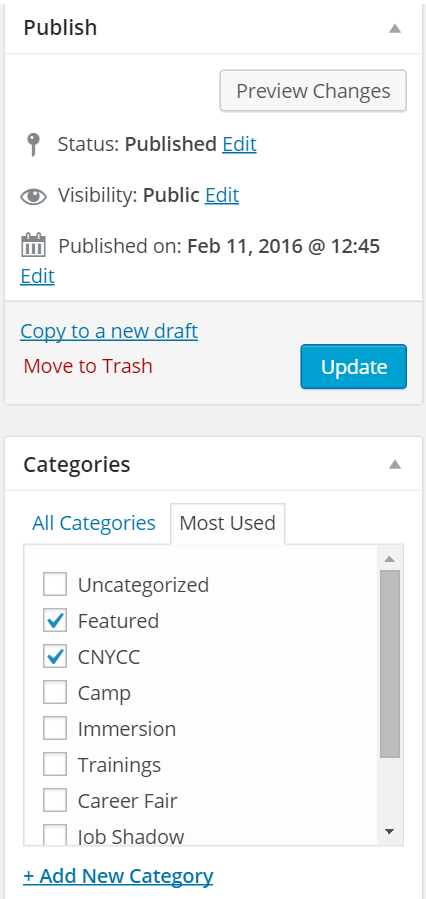
3. In Categories, you can select one or more fields using check boxes. Examples of categories include Immersion, Internship, and Job Shadow. Select the ones which relate to the post you are adding. If no category applies to your specific blog post, you can add a new category using the link ‘Add New Category’. You can check the list of ‘Most Used’ categories as well. In Tags, you can add names separated by a comma and can even choose from the most used tags.
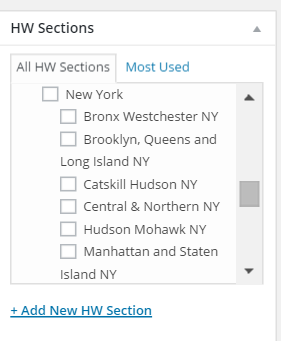
4. If applicable, add your area or section from the HW Sections drop-down list.
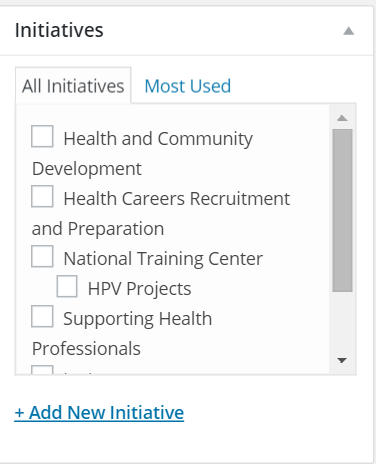
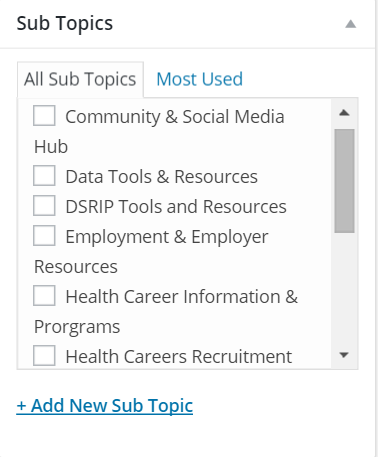
5. You can also select initiatives and sub-topics using multiple check boxes.
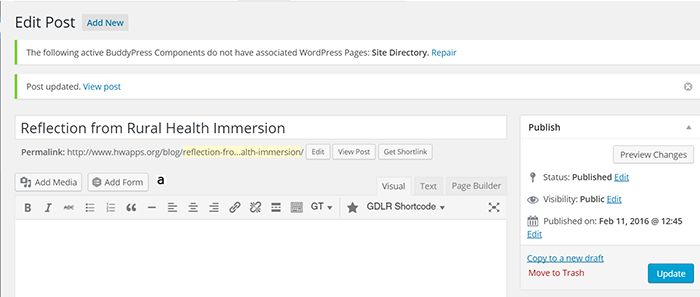
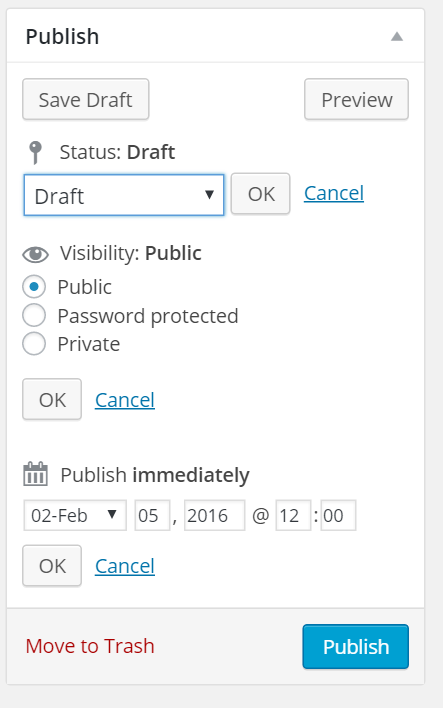
6. Once you have added all content, select 'Publish' at the right side of this form to publish your post to HWapps. Clicking 'Save Draft' will save the draft in order to publish later. You can also select the ‘Preview’ button to view the post on HWapps before publishing. To change the status of the draft, click the ‘Edit’ button. The visibility of the post can be changed from ‘Public’ to ‘Password Protected’ or ‘Private’. You can also set a time to publish this post at the time of your choosing--be sure to save the post before adding the date and time. If you don’t wish to save this post, you can delete it using the ‘Move to Trash’ link in red. When you're ready to publish, simply click the ‘Publish’ button. Once the post is published, you will receive an email mentioning that your post has been published.
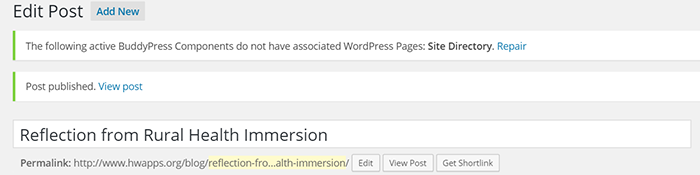
7. Once the post has been published, you can view the post by clicking on 'View Post'. If you wish to edit the link, click 'Edit'.
Managing Blog Posts
- Go to http://www.hwapps.org/wp-admin/ and click on 'Posts' from the left sidebar. You can see sub-items down the ‘Posts’ Menu.
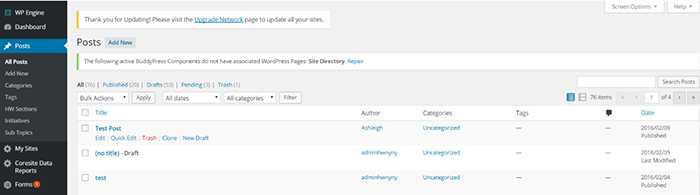
- 'All Posts' is the list of all added posts along with deleted and draft posts.
- Below the title of the post, a list of all posts is provided in the 'All' sub-item. The 'Published' sub-item provides a list of posts you or your organization have previously published on HWapps. 'Drafts' are the post still in the draft phase that have not been published to HWapps. Any post still in draft form can be modified and saved at any point before publishing. The 'Pending' sub-item is the list of posts saved before publishing on HWapps. 'Trash' is the sub-item that refers to the list of all deleted posts.
- Below this menu, there is a dropdown list provided. By selecting 'Edit' or 'Move to Trash', for example, you can apply these actions in bulk to selected posts in the list.
- By selecting 'All dates' in the dropdown menu, you can select monthly published content and filter posts.
- You can search for a particular post by using the 'Search Posts' button at the extreme right corner.
- If you hover over the post you have added, you can see the shortcut menus 'Edit', 'Quick Edit',
- By hovering over the post you have added, you can view shortcut menus ‘Edit’, ‘Quick Edit’, ‘Trash’, ‘Clone’, and ‘New Draft’. ‘Quick Edit’ allows you to quickly edit the content of blog post without opening another tab. After editing, you can update/cancel the changes and preview the post. ‘Clone’ will create the exact same post and will automatically save in ‘All’ posts. ‘New Draft’ will create a similar post, of which the draft will get saved in the ‘Drafts’ list.

2. After a post has been published, you can update the post at any time. Click on 'Edit' to update information, then click 'Publish' when you are ready to save the changes and publish immediately.
- You can also click on the 'Status: Published Edit' link to change the blog post's status from 'Published' to 'Draft' status. This will un-publish the blog post, therefore making the blog post unviewable on HWapps.Once you are ready to publish and make the blog post viewable again, simply click on the 'Publish' button.
- You can also change the visibility of your post from the default 'Public' to 'Password Protected' or 'Private'.
3. Once the post has been published, you can view the blog post by using the Permalink or by clicking on 'View Post'. You can also change the link to the blog post by clicking on 'Edit'.